

一、环境
debian 11 x64
nginx v1.26.1
alist 开启了SSL
需要一台网络较好的服务器,且流量和带宽都比较富裕。因为需要从网盘下载到代理服务器再转发给客户端,所以会消耗双份流量。
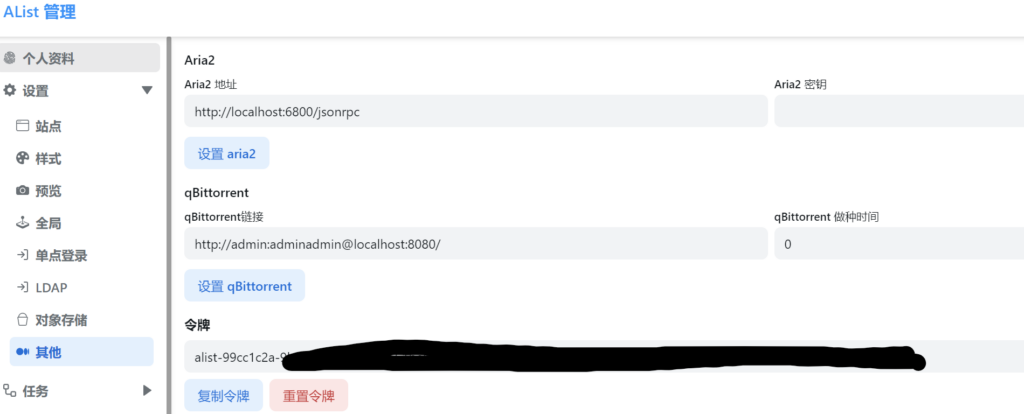
Alist的token,启动代理程序用
二、
2.1 代理程序
下载地址:https://github.com/alist-org/alist-proxy/releases
按需选择自己的版本
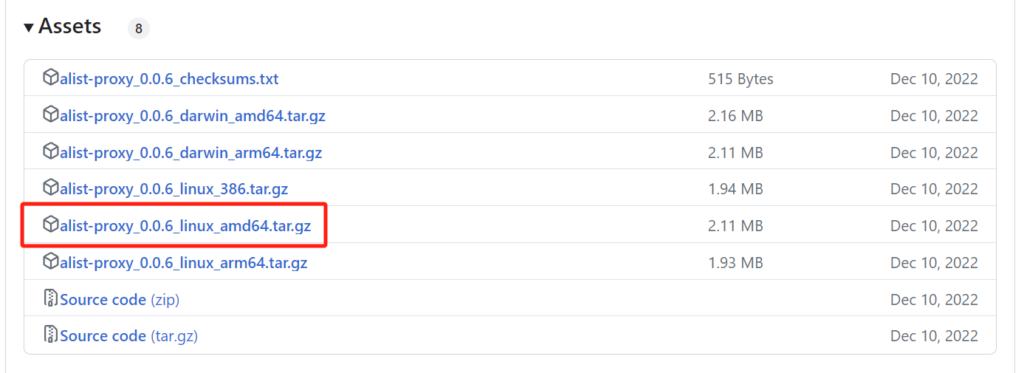
按以下命令下载、解压、赋予执行权限操作,注意非x64架构系统的自己替换链接
wget 'https://github.com/alist-org/alist-proxy/releases/download/v0.0.6/alist-proxy_0.0.6_linux_amd64.tar.gz'

tar -xzvf alist-proxy_0.0.6_linux_amd64.tar.gz -C alist-proxy_0.0.6

cd alist-proxy_0.0.6

chmod +x alist-proxy
2.2 nginx
2.2.1 nginx
nginx安装参考官方文档(debian):https://nginx.org/en/linux_packages.html#Debian
安装完成后重启系统。
配置域名以及SSL证书
再/etc/nginx/conf.d目录下新建 your_domain.conf,填入以下参数。注意/home/SSL/ 位置自己设置
## The below will force all nginx traffic to SSL, make sure all other server blocks only listen on 443
server {
    listen 80;
    server_name alist-proxy.yourdomain.com;

    return 301 https://$host$request_uri;
}

## Start of actual server blocks
server {
    set $yourhost http://127.0.0.1:5243;

    listen 443 ssl;             ## Listens on port 443 IPv4 ssl enabled
    listen [::]:443 ssl;    	## Listens on port 443 IPv6 ssl enabled
    proxy_buffering off;        ## Sends data as fast as it can not buffering large chunks.
    server_name alist-proxy.yourdomain.com;

     ## SSL SETTINGS ##
    ssl_session_timeout 30m;
    ssl_protocols TLSv1.2 TLSv1.1 TLSv1;
    ssl_certificate      /home/SSL/alist-proxy.yourdomain.com.crt;  ## Location of your public PEM file.
    ssl_certificate_key  /home/SSL/alist-proxy.yourdomain.com.key;  ## Location of your private PEM file.


    location ^~ /swagger {
        return 404;
    }


    location / {
        proxy_pass $yourhost;  ## Enter the IP and port of the backend  server here.
	    client_max_body_size 1000M;  ## Allows for mobile device large photo uploads.

        proxy_hide_header X-Powered-By;	 ## Hides nginx server version from bad guys.
        proxy_set_header Range $http_range;  ## Allows specific chunks of a file to be requested.
        proxy_set_header If-Range $http_if_range;  ## Allows specific chunks of a file to be requested.
        proxy_set_header X-Real-IP $remote_addr;  ## Passes the real client IP to the backend server.
        proxy_set_header Host $host;  ## Passes the requested domain name to the backend server.
        proxy_set_header X-Forwarded-For $proxy_add_x_forwarded_for;  ## Adds forwarded IP to the list of IPs that were forwarded to the backend server.

    }

    # 访问日志和错误日志的路径
    access_log  /var/log/nginx/alist-proxy.yourdomain.com.access.log;  ## Creates a log file with this name and the log info above.
    error_log  /var/log/nginx/alist-proxy.yourdomain.com.error.log;
}
2.3 设置程序守护,开机自启服务
再/etc/systemd/system 目录下新建alist-proxy.service。
/root/alist-proxy_0.0.6/alist-proxy 是你代理程序的绝对路径
https://your_alist_domain 是你的alist的网址
[Unit]
Description=alist-proxy Service
After=network.target

[Service]
User=root
Group=root
ExecStart=/root/alist-proxy_0.0.6/alist-proxy -address https://your_alist_domain -token (填写你Alist的token,去掉括号)
Restart=on-failure
RestartSec=30

[Install]
WantedBy=multi-user.target
保存后输入以下命令启用代理
sudo systemctl enable alist-proxy.service
sudo systemctl start alist-proxy.service

#查看状态
sudo systemctl status alist-proxy.service
如上图所示为启动成功。
2.4 开启BBR提高网络吞吐率
debian11 内核已包含了BBR ,输入以下命令直接启用即可
echo "net.core.default_qdisc=fq" >> /etc/sysctl.conf
echo "net.ipv4.tcp_congestion_control=bbr" >> /etc/sysctl.conf
sysctl -p
sysctl net.ipv4.tcp_available_congestion_control
若显示“net.ipv4.tcp_available_congestion_control = reno cubic bbr” 字样即为成功。然后重启系统。
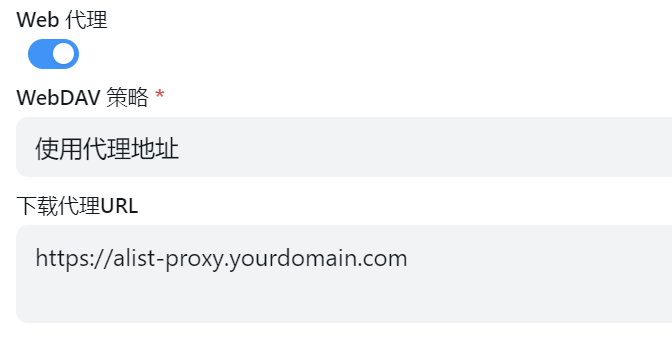
三、使用代理服务器
在alist后台 -> 存储设置 按下图设置
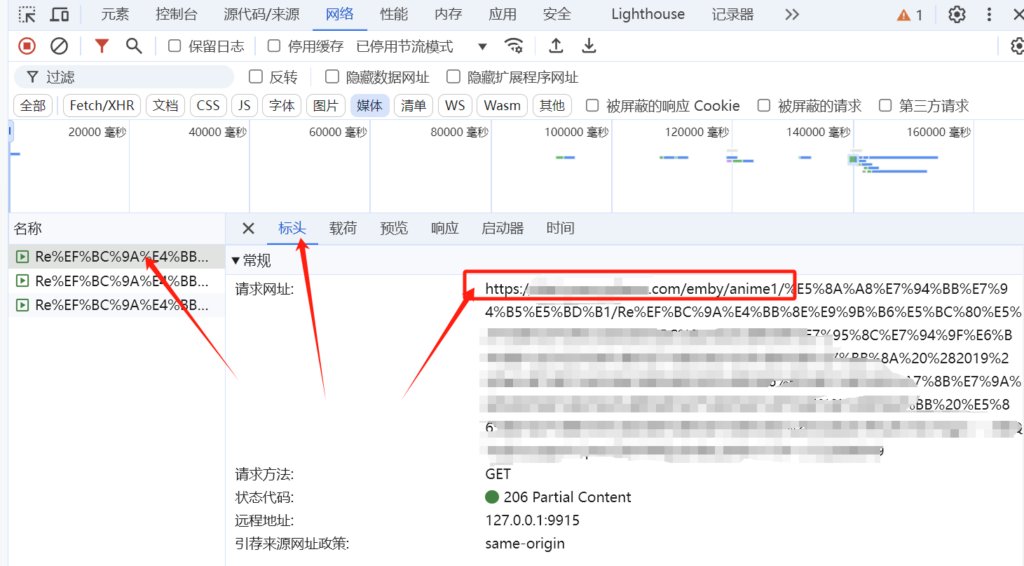
如何查看是否成功:
网页打开alist,按F12打开开发者工具。选择网络 -> 媒体
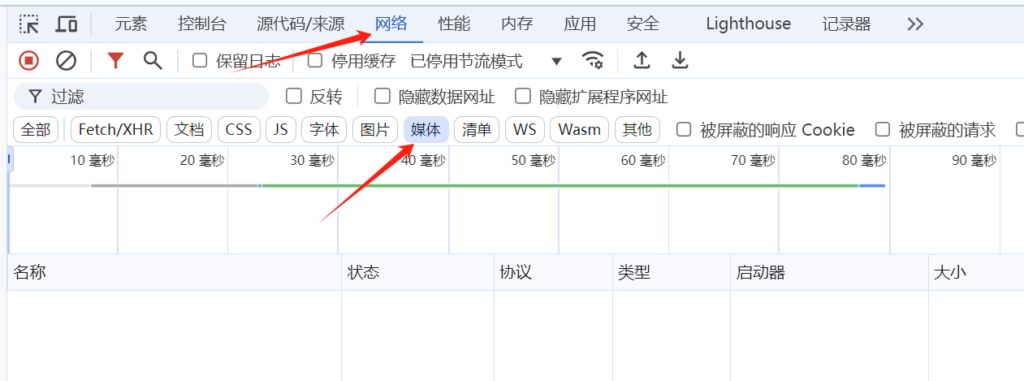
打开一个视频,查看请求的域名是否为代理服务器的域名,即上文中的alist-proxy.yourdomain.com。并且视频可正常播放。
Comments 1 条评论
左哥太强了吧!!tql!!!